Tool Gifer is very easy to use, the download link is Gifer
The article is all about the introduction of this tool.
Function
Gifer is a simple screen video tool which can generate a GIF file. Users can set the number of frames per second and create a different video.
The tool is developed with QT that’s an outstanding desktop cross-platform UI frame. We use FFmpeg to handle multimedia files and streams, it helps us to form GIF file at the end. So you should install FFmpeg on the computer if you want to use Gifer successfully.
The software working page looks like this:
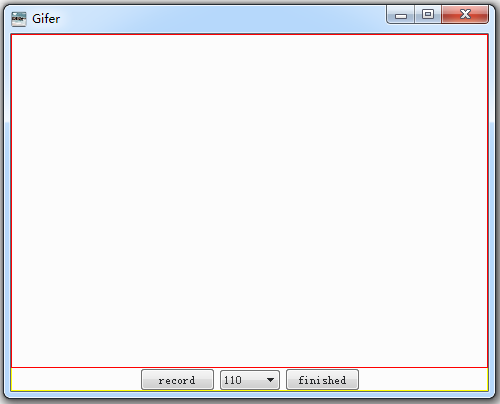 Win7
Win7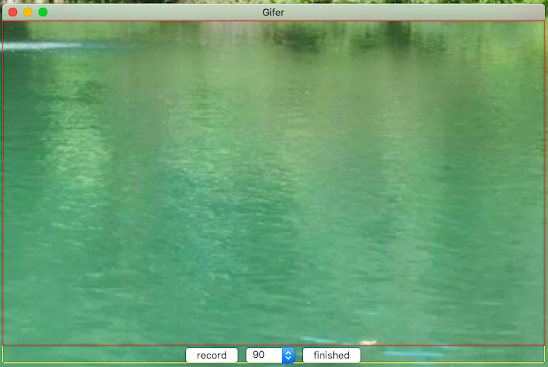 Mac OS X
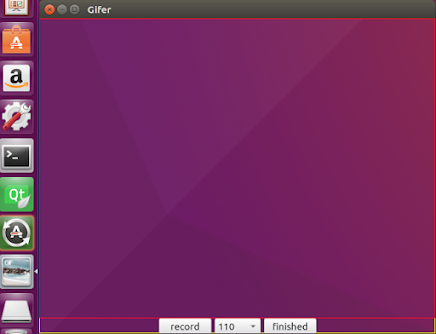 Ubuntu 16.04.1
The center area in red line is in charge of screen recording, there is a recording button, finish button and frame rate parameter setting list in the bottom.
You can put the cursor in the center area, start to record and click another area which is not in red line rectangle, all input operations will be recorded and the cursor can be controlled by us again.
You can put the cursor in the center area, start to record and click another area which is not in red line rectangle, all input operations will be recorded and the cursor can be controlled by us again.
For frame rate parameter option, there are different values 30, 50, 70, 90, 110, 130, 150 and etc.
FFmpeg supports the command
Usage:
FFmpeg supports the command
ffmpeg -threads 1 -y -r 1 -i ./out%d.png -final_delay 300 output.gif.Usage:
-thread: how many threads will work (we can set two thread to pick up speed if there is also an audio stream).-y: replace an old file if the name of the output file is the same with it.-r: the number of frame per second.-i: input file.-final_delay: the static period after finishing playing gif.So if frame rate is smaller, gif playing faster, the option number is bigger, gif playing slower.
The following gifs are from video Michael Jordan to the Max
The upper one’s frame rate is 30fps and the lower has 90fps:
The following gifs are from video Michael Jordan to the Max
The upper one’s frame rate is 30fps and the lower has 90fps:
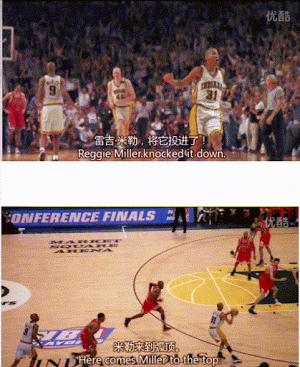
We can find the difference between both images by comparing Miller’s celebration actions after he shot a three-pointer.
You may get the following notice when using this tool if the computer has not FFmpeg.
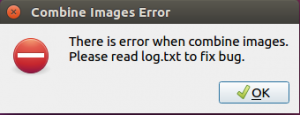
Relevant output log is like:
sh: 1: ffmpeg: not found
Xlib: sequence lost (0x10d81 > 0xd82) in reply type 0x23!
Aborted (core dumped)
The log.txt is at the same directory with executable.
Please make sure there is executable or link file under
For windows platform, you need be sure the exist of
For unix platforms such as Ubuntu, local installation command like
The library download link: FFmpeg
Please make sure there is executable or link file under
/usr/bin if you installed FFmpeg library on mac.For windows platform, you need be sure the exist of
C:Program Filesffmpegbinffmpeg.exe. You can download mobile executable file from official website, it is not necessary to install or register ffmpeg.For unix platforms such as Ubuntu, local installation command like
apt-get will help users to do all things.The library download link: FFmpeg
Usage
For mac os x, Gifer.app will become bigger in a short time because grabbed images are all put in the executable directory. But these temporary pictures will be deleted if you close the program. So the size of Gifer.app is stable.
The size of Gifer on window or ubuntu keep same all the time due to that all temporary pictures are put in folder Pictures.
There is a similar tool called Gifox on mac, it’s easy to use but the tool will add watermark on generated image.
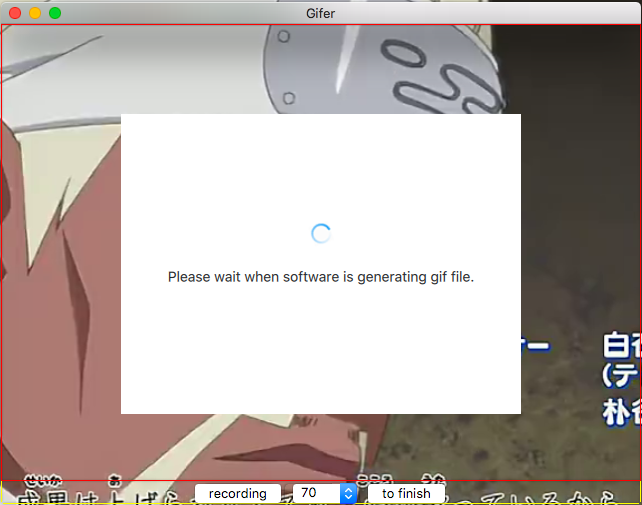
After user click button to finish, the software will combine all grabbed images and create a gif file. There is a short waitting period.
The size of Gifer on window or ubuntu keep same all the time due to that all temporary pictures are put in folder Pictures.
There is a similar tool called Gifox on mac, it’s easy to use but the tool will add watermark on generated image.
After user click button to finish, the software will combine all grabbed images and create a gif file. There is a short waitting period.